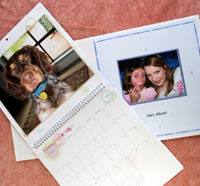
Most photographers will know of one or more companies that can print and bind customers’ photos into photo books (a Google search on Photo Books yields at least 10 pages of local suppliers).

Inspiring ways to improve your photos
Inspiring ways to improve your photos
Most photographers will know of one or more companies that can print and bind customers’ photos into photo books (a Google search on Photo Books yields at least 10 pages of local suppliers).
With the release of inkjet printers and special papers and inks, digital photographers can now produce ‘fine art’ prints with a quality that was formerly only achievable through chemical means. But, as with traditional photography, good results can only be obtained with effort and understanding.
Once you’ve mastered the basics of image editing you can move on to explore the tools that serious photographers use to correct minor flaws in images before printing them or posting them on websites. The most useful tools are those for selective adjustment of brightness, contrast and colours.
recently reviewed the new Epson Pro 3800 A2 format, eight-colour inkjet printer. Who would have thought just two years ago that for around the same cost as a half-way decent black and white darkroom, we could purchase a printer with which we can, with a few mouse clicks, produce truly extraordinary, full-colour 42 x 60cm poster prints at home? Let alone have sub-$1000 cameras which can do justice to that size of enlargement!

If you mislay the CD that came with your printer and need to re-load the driver for a particular printer (for example, when you replace a computer), you can usually download the necessary driver from the website of the manufacturer of your printer. You may also require a new driver when you upgrade your computer’s operating system. Drivers are usually found on the Support page.

If you are forced to print with an uncalibrated monitor and rely on a non-colour-managed workflow, you can waste a lot of ink and paper. However, there’s an easy way to minimise the amount of paper you use to check the image will print correctly: make test strips. Here’s how to go about it.

The printing heads in inkjet printers are precision-engineered to perform a specific function: placing thousands of tiny ink droplets accurately on a sheet of paper to create a photo print. Ink is a critical component in the system. Each printer manufacturer formulates inks to meet the needs of the print heads in printers in their range. In some cases there is a different set of inks for each individual printer; in others, one ink set can be used with several models in the range.

In an ideal world, you would be able to point your digital camera at a subject, take the photo and then make prints that either match reality or improve upon it. But, in the real world, your camera must communicate with your computer which, in turn has to ‘talk’ with your printer. In this process, colour information is passed along a chain and re-interpreted by each device. This chain is known as a ‘workflow’.

If you own a digital SLR (DSLR) camera – or a high-end compact digicam – you will find it provides two file format settings: JPEG and raw (often shown as RAW). When you shoot a JPEG image, the camera’s image processor with adjust the contrast, sharpness, colour saturation and white balance BEFORE the image is saved to the memory card. When you shoot a raw image, this processing is deferred until the file is opened in a computer.


How to capture high-quality, eye-catching action shots.
See more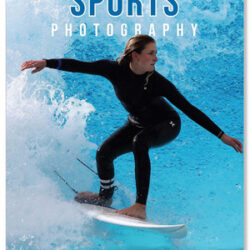


Ads can be a pain, but they are our only way to maintain the server. Please deactive Ads blocker to read the content. Your co-operation is highly appreciated and we hope our service can be worth it.