How to choose the right editing tools for your photography, and how to make the most of your software.
Over time, every photographer worthy of the title chooses a software application and learns how to use it to improve their images. It’s an essential step in the capture-to-output process that underpins all photography.
Sometimes the application we choose does just what we want it to. But all too often we’ll come across little quirks that make us wonder if there’s a better alternative. In this feature we look at how to decide what kind of software will meet your needs – whether you’re just starting out or already a capable and experienced editor.
We’ll begin with a few key questions.
1. Do you want DAM?
This is the first question to ask when choosing an image editor. Would you like a package that combined editing tools with file management (digital asset management or DAM) capabilities. Or do you prefer an application with only editing tools? There’s an important distinction between them.
Applications that combine DAM with editing take over your files as you upload them to your computer and sort them according to predetermined parameters, before storing them somewhere among your computer files. The process can be complex to set up, depending on your preferred workflow.
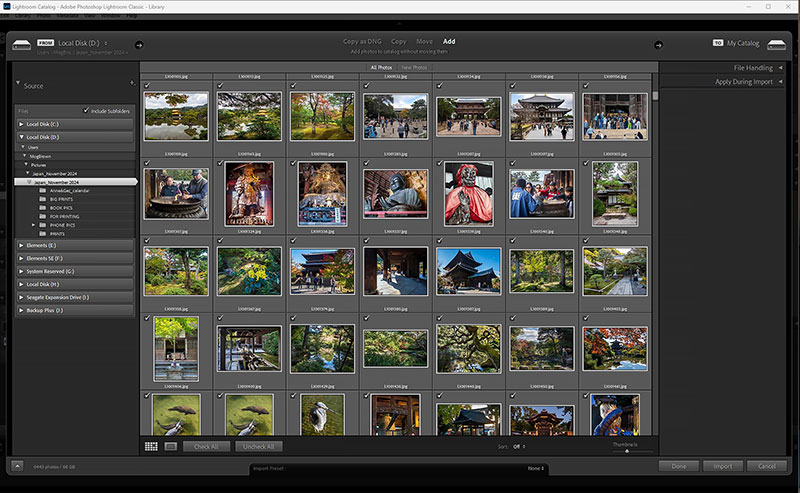
Combined image editor and file management applications like Adobe Lightroom Classic (shown here) automatically find image files and folders anywhere in your computer and catalogue them. As new images are uploaded, they are added to the catalogue, usually filed by the date they were uploaded or the date on which they were taken. This should make them easy to locate – depending on how you like to work.
Some photographers see file management as playing an important role in their imaging workflows. Applications that include file management include Adobe’s Lightroom Classic and Photoshop Elements, ACDSee Photo Studio, Capture One Pro, Canva and Zoner Studio as well as the free application Darktable. They vary in their capabilities and pricing. Free trial downloads let you see how well the application meets your needs before you purchase it.
Zoner Studio includes DAM but makes it voluntary instead of taking over your files; you simply click on the Import button at the bottom of the Manager panel to ingest the files on an SD card. If you prefer organising your files yourself, you can open images from your normal file structure via either a Fast or Full Quality preview.
Some photographers find DAM software irritating because they don’t like how files are catalogued. These photographers will be happiest with stand-alone editors like Adobe Photoshop, Serif Affinity Photo, Corel PaintShop Pro, CyberLink Photo Director, Skylum Luminar Neo, Retouch4me, and freeware applications like GIMP and Faststone.
2. Pay once or subscription?
The next decision to make is whether you’d prefer to buy with a one-off payment or an on-going subscription. One-off purchasing can make budgeting easier but, if the developer issues a new and improved version of the software, you’ll have to pay again to upgrade to it.
The main advantage of buying a subscription is that as improvements and refinements occur, you’re always using the latest version of your software. Some developers update their software very regularly, while others provide less frequent improvements. Expect to pay more for frequently-updated packages.
A few developers offer yearly subscriptions with a relatively low annual fee and the option to renew for a similar amount. Others offer free trial periods or introductory offers which turn into full fee payments when you renew.
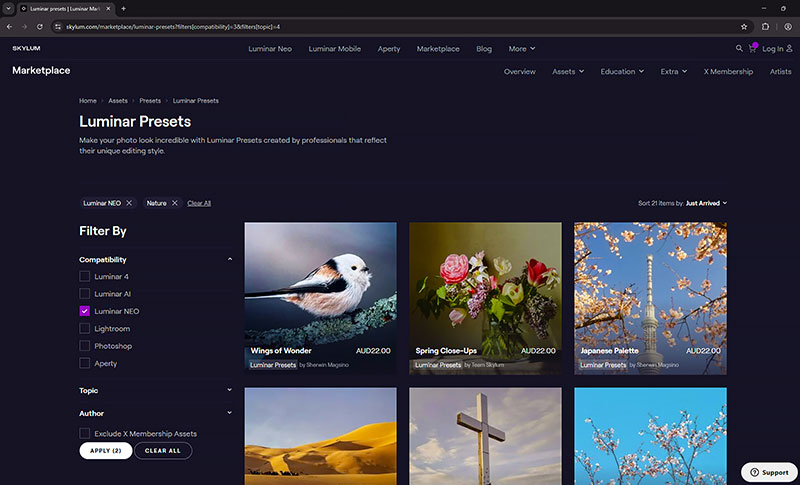
Skylum is one of the developers that offers additional presets for users of its Luminar software to purchase. They provide a good way to access different ‘looks’ to complement your images and they’re constantly being updated.
A few developers apply additional charges for ‘extras’ functions not included in the basic package. These often rely on ‘AI processing’ but may also include photo merging functions for combining HDR frames and focus stacking. It’s up to each photographer to decide whether they want these additions; but it’s nice to have the choice.
Windows, MacOS or Linux?
Most image editors are released for the Windows and MacOS platforms, although a few, like Corel PaintShop Pro, are Windows only and Pixelmator Pro is MacOS only. GIMP (which stands for the GNU Image Manipulation Program) is a genuine cross-platform image editor that is available for GNU/Linux, MacOS, Windows and other operating systems. It is free to download and users can change its source code and distribute the resulting changes.
Darktable is another freeware editor that is available for Windows and macOS platforms but also provides community-maintained Linux/Unix binary packages for operating systems that can run a graphical session. Created by developers that are also keen photographers, it includes GPU accelerated processing and professional standard colour management.
4. Non-destructive editing
Most image editors these days work non-destructively; that is, they keep the original image file untouched and always accessible. All edits are made on separate layers or with tools that don’t modify the original pixels, which means changes can be easily reversed if you’re not happy with them. Make sure the software lets you see the changes you’ve made in real time with on-screen previews.
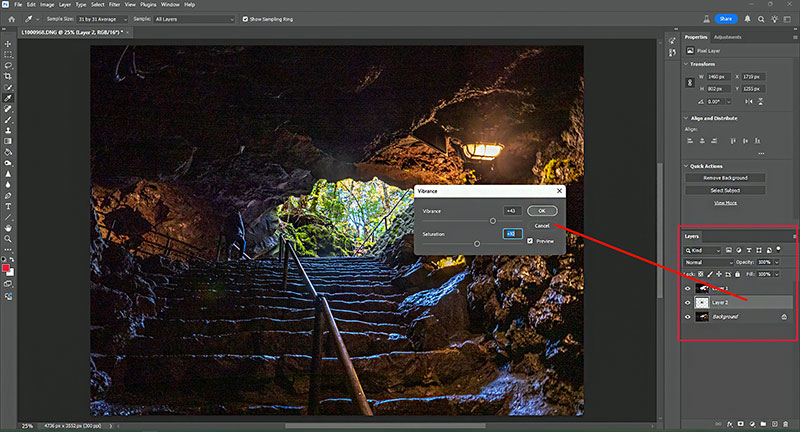
Adjustment layers let you make changes to selected parts of an image without affecting the remainder. A non-destructive application like Adobe Photoshop (shown here) keeps track of up to 20 editing steps by default, making it easy to go back to previous editing steps you’ve taken. (This can be increased to a maximum of 1000.)
Look for features like adjustment layers, masks, smart objects, virtual copies and multiple ‘undo layers’ and always check how many times you can go back and start again without having to lock in changes you’ve made. This shows you how much flexibility the software provides.
The editing environment
Your eyes can only discern a dynamic range of about eight stops which, fortunately, is much the same as most printing media. It’s also more than some paper/ink combinations so, when you’re editing sRGB 8-bit JPEGs on a standard screen, you’ll probably be restricted to about six stops.
It’s much easier to make adjustments confidently if your editing environment doesn’t interfere with the view of your images on the monitor. This means working in a dimly-lit room and preventing beams of light from falling on the screen.
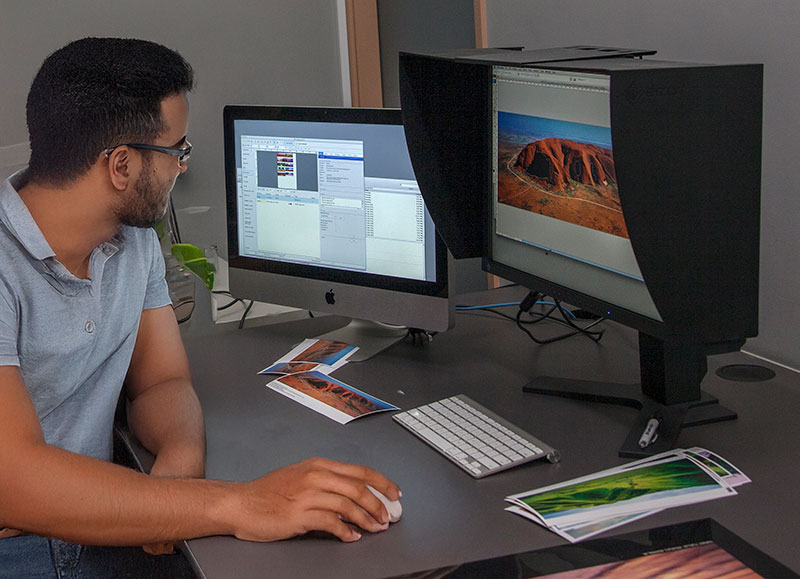
You’ll find it easier to edit your photos if you set up your equipment in a room with slightly lower than average light levels and where there is no chance of light reflecting from the monitor screen. A shading hood, like the one shown here, can keep your screen relatively glare-free.
Shading hoods are available for most of the monitors sold for image and video editing. They may be bundled with the screen itself or offered as an optional accessory. In the latter case, they are a worthwhile investment.
5. What tools do you need?
The price of a software package usually reflects the breadth of its tool set and the scope of the adjustments you can make. Exceptions to this rule of thumb are the two freeware applications, GIMP and Darktable, each of which contains a comprehensive tool set.
Even the simplest packages should provide basic tools for cropping and resizing, brightness, contrast and colour adjustments and rotation and straightening. Most also include sharpening and blurring brushes while slightly more sophisticated applications provide cloning and healing tools and Levels and Curves adjustments.
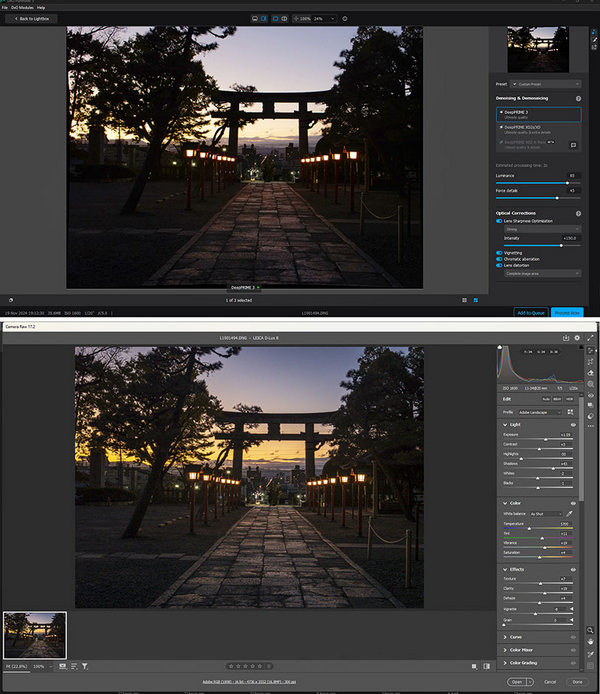
These two screen grabs show how raw file processors differ between software developers. The top one is the interface from DxO PureRaw 5, which was developed by DxO Labs, which specialises in image analysis. The lower one is from Adobe Camera Raw and contains the full tool set available to Photoshop users. (Photoshop Elements users get a reduced tool set.)
Raw file development is a worthwhile inclusion, although it can be fraught with problems because the software requires updating periodically to ensure it is compatible with the latest camera releases. This may not matter much if the camera you use is a couple of years old but it’s worth knowing if you’ve just bought a new camera as it can take several months for some applications to be updated. (Note: this won’t matter if your camera saves raw files in the ‘universal’ DNG format as all raw file processors can use it.)
Expect to pay more for better editing tools and for frequent updates to raw processors to ensure compatibility with new equipment.
6. How useful are AI features?
‘AI’ based tools have become popular marketing strategies for software developers and we’ve found it interesting to track the capability of the AI functions in various applications we’ve reviewed over time. In theory, these features should save you time when carrying out common editing tasks.
Actual implementations of AI often tell a different story. In many situations, claimed performance falls frustratingly short of expectations. Selection tools may not pick up key parts of a subject – or they’ll rope in areas that have nothing to do with the subject. (A lot depends on the nature of the background and the differences in tones between the background and the subject.)
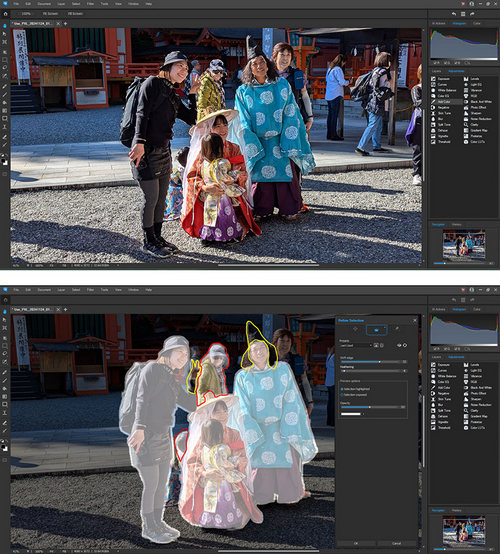
These two screen grabs illustrate the difficulties many AI selection tools have when trying to identify the subject of the shot. Too often they fail to pick up key parts of the subject (outlined in yellow in the lower screen grab) or select unwanted areas (outlined in red). If you can’t adjust the AI selections, the tool is of little value.
When an AI tool works well, it should save you time and hassles. But real-time experience shows that while many tools come close to the mark, few applications include manual overrides that let you correct the inevitable deficiencies.
Sky replacement is one of the better-developed AI-based tools, particularly when the developer provides adjustments for positioning the sky with respect to the main subject and feathering or fading the edges of the selection. You should also be able to adjust the brightness, contrast and saturation of the ‘new’ sky to make it integrate more naturally with the scene.
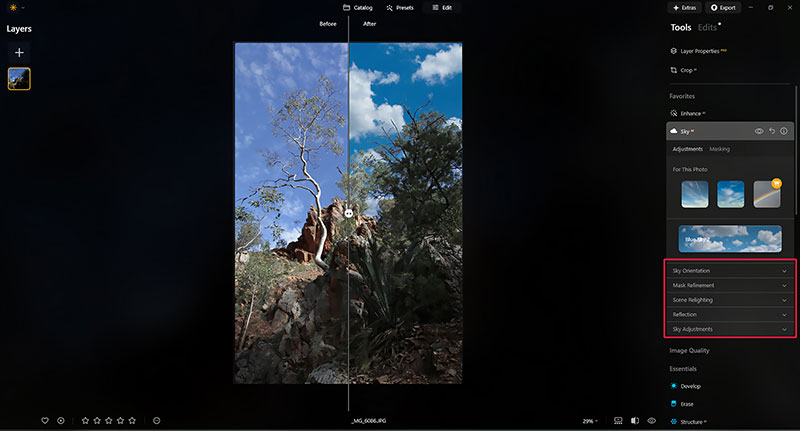
Sky replacement tools should allow you to scale, shift and fade (or feather) the replacement area and give you control over its brightness and colour parameters, as outlined in red in the tools panel in this screen grab. The best applications can seamlessly blend the new sky into the subject, as shown on the ‘After’ side of the image panel in this screen grab.
AI-based face identification is also relatively well developed and efficient, although sometimes the software lacks adequate selection and masking facilities. Lighting features that let you add sun rays or directional lighting can also work well – provided you can adjust them to suit your requirements.
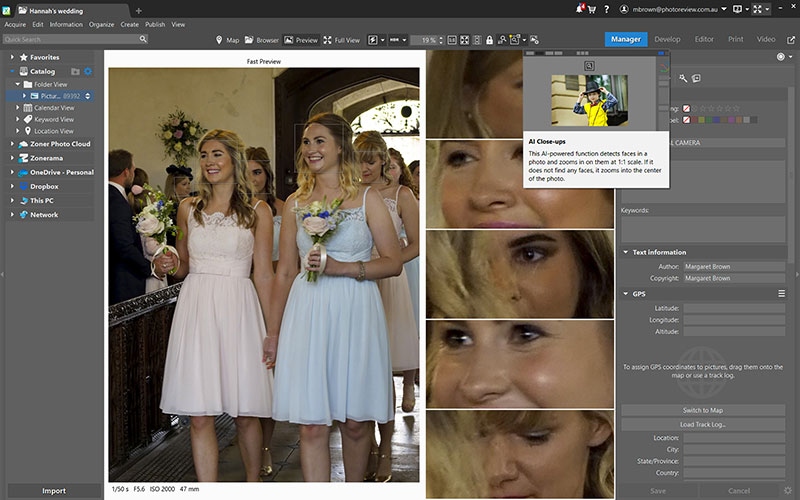
Face detection is one of the better-developed AI tools.
We’ve found the best AI-based generative fill tools really useful for filling in the corners of images that have been rotated to straighten their horizons. Subject removal using generative AI can be hit-and-miss as success depends on how easy it is to replicate the pixels in the surrounding area well enough to create a seamless fill. The larger the area the software has to cover, the less successful the process tends to be.
Article by Margaret Brown (see Margaret’s Photo Review pocket guides)
Excerpt from Photo Review Issue 102
See Photo Review Membership options