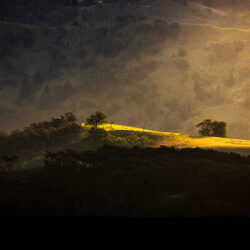
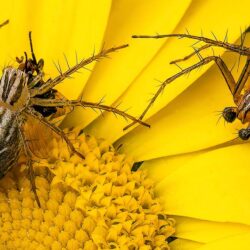
Basic photo editing tools that can be applied to the whole image to help restore damaged photos.
Full restoration of damaged photos can be very time-consuming and involve a lot of detailed work. Fortunately, some fixes can be really simple and achievable with a couple of clicks and/or slider adjustments. But some images have damage that is harder to fix.
There’s not much you can do to repair physical damage. Torn prints may be repairable with tape on the back of the print to hold the pieces together before they are scanned, but they will need plenty of localised ‘touch-ups’ to cover-up the damage.
Negatives and prints that have been cut are almost impossible to repair but may be improved with extensive editing, if you feel it’s worth the effort.
When working on scanned images, it’s normally easiest to start by duplicating the image to produce a Layer on which your adjustments can be made. This leaves the original image unchanged so that if you make a complete mess of any adjustments you can go back and start again.

Shows how to create a new Layer that copies the original image. Note the Layers dialog box outlined in red in the lower right corner of the screen, which shows the image has been duplicated.
Darkening of the bar for the top layer shows it is ‘active’, while the eye icon beside it shows it’s visible. Any adjustments you make will only be applied to the ‘active’ layer. Clicking on the lower bar swaps the ‘active’ layer to the lower one. You can check the status of the lower layer by clicking on the eye icon beside the upper layer – and vice versa.
The focus in this chapter is on adjustments which act globally on the image and are used to bring the image as close as possible to a ‘normal’ tonal balance. (Other features of Layers adjustments are covered in detail in other chapters of the book.)
Most editors provide global adjustments for brightness, contrast, sharpness and colour saturation. Noise-reduction filters can also be handy. These basic tools can handle fading and colour changes.
More capable editors provide Levels and Curves controls, which give you an easy way to correct the tonal range and colour balance across shadows, midtones, and highlights. Levels and Curves controls work slightly differently but have very similar overall objectives, so it’s up to the user to decide their preference.

The top picture shows the scanned original, which has faded in the 55 years since the shot was taken (as confirmed by the Levels graph superimposed on the image). Moving the arrow on the base line of the Levels graph to the right is enough to restore much of the dynamic range and colour intensity of the original image.

A Curves adjustment carried out on the same image as used for the Levels adjustment. Curves adjustments can be a bit more selective since you can anchor some tonal areas by clicking on the diagonal line, leaving you free to adjust a narrower range of tones by changing the height of the line in a selected area.
Once overall tonality has been set, yellowing and fading are easy to fix with one-click Auto Tone, Auto Contrast and Auto Colour functions. Simpler editors, especially those which run completely online and those bundled with computer operating systems, are usually restricted to Filters, which are much less refined and precise.

One-click Auto Tone, Auto Contrast and Auto Colour functions can achieve immediate improvements to faded photographs.
Faded colours can be improved with adjustments to Vibrance and Saturation, which also act globally on the image. Vibrance sliders are used to increase the intensity of less-saturated colours without affecting colours that are already quite strong.

The lower image in this pair shows the effects of increasing Vibrance and Saturation levels in the image after the auto corrections have been applied.
Sharpening and Blurring tools are other global tools that can also be useful for photo restoration, especially the former. Most digital images require additional sharpening, largely because of the way they are created. Raw scans are always a little soft because scanners work by sampling the image data and averaging values. This tends to reduce contrast and slightly blur the image.
Sharpness results from two factors: resolution and acutance. Resolution indicates the size of the image in pixels – which is why it’s so important when setting scan resolution. Acutance relates to how well defined the edges are in an image; edges with higher contrast look sharper.
The best way to approach image sharpness is by applying sharpening when images are scanned and again after the image has been edited. This is true whether you’re working on an image that came directly from your camera or on a scanned image.

Sharpening lets you improve scanned images that are a little soft but it can’t fix images that were blurred when the photo was taken.
When it comes to sharpness adjustments there’s not much you can do to make a blurred original sharper, although there are a couple of filters you can try that might make it appear a little sharper. Sharpening filters usually work by increasing contrast between adjacent pixels along definable edges which creates an impression of higher acuity.
Most image sharpening is done by unsharp masking, which works by slightly blurring the image, creating a mask and comparing it with the original. Sharp edges are prioritised, creating a result that is less blurry. There are usually at least three adjustments available:
Amount sets how strongly the edge contrast effect is applied across the percentage range between 1 and 500.
Radius controls the pixel width of the blurring with a range from 0.1 to 1000 pixels. Low values are best for images containing fine details. Try to match the radius setting with the size of the smallest detail in the image.
Threshold sets the minimum brightness variation before edge contrast is added. With the slider at zero, every pixel is sharpened, while at 255 no sharpening is applied. The best setting is always in between, with a position between 3 and 10 giving optimal results in most cases.
It’s best to work on an enlarged image so you can see the effect of adjustments. Begin with low values and gradually increase them until you achieve the results you’re happy with.

Three adjustments in Unsharp Masking allow users to control the strength, precision and level of sharpening applied to the image. (The source image is a colour slide, taken in China in May 1989, which gives it historical importance.)
Photoshop also provides a Smart Sharpen option that uses a different set of algorithms based on edge detection. This method produces fewer halo artefacts than Unsharp Mask and also includes a Reduce Noise slider plus a dropdown menu with options for removing Gaussian Blur, Lens Blur and Motion Blur. A separate dropdown panel has individual Amount, Tonal Width and Radius sliders for tweaking highlights and shadows.

The adjustments provided in Photoshop’s Smart Sharpen filter.
It’s worth experimenting with both methods since each will work better on different images. While the Unsharp Mask filter is a good general-purpose tool and quick to use, the Smart Sharpen filter will often be a better choice for scanned images since it provides a wider range of adjustments.
Watch out for tiny blemishes in the images, which may not be noticeable until the image has been sharpened. Over-sharpening will often increase visible granularity and introduce some unwanted artefacts. Unfortunately, the Reduce Noise slider works by slightly blurring sharp edges, which may counteract the adjustments you’ve made. Practice will show you which sliders to adjust and how much to move them to obtain optimal results.
Having restored an acceptable amount of tonal and colour balance, you can then turn to local adjustments to address any cracks in the emulsion and dark and light specks that represent additional surface damage. The tools used for correcting these flaws are covered in the next chapter. (Chapter 6 of Photo Restoration pocket guide)
This article by Margaret Brown is an excerpt from Photo Restoration pocket guide
Pocket guide Partner: Camera House


