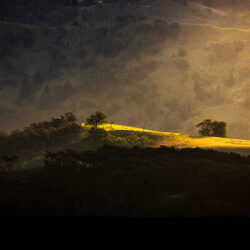
Tips for using the Levels adjustments in an image editor to control brightness, contrast and colour balance.
All image editors provide fairly similar tools for adjusting image brightness and contrast, however many photographers don’t realise the full capabilities of most of these tools; they never look beyond the most simple slider adjustments.
In this article we look at some of the more advanced ways to use Levels adjustments, giving you more control over the final result.
Note: when experimenting with your own image we recommend creating a new copy to work on so your original file is preserved.

The Levels adjustment in Photoshop is accessed by selecting Image > Adjustments > Levels.
Brightness and Contrast Adjustments
The main use for the Levels adjustment is to correct the tonal range in images by adjusting intensity levels of image shadows, midtones and highlights. This control can help restore natural-looking tonal relationships across the brightness ranges of images. It can also bring out details in shadows without compromising highlights.

The Levels adjustment dialog box shows a histogram mapping tonal distribution in the image, along with three sliders for tweaking the black point, white point and midtone. The Output Levels scale below the histogram represents the image’s tonal range.
The traditional way to use the Levels adjustment is by dragging the arrows below the X axis of the histogram inwards to the points where the graph begins to appear above the baseline (circled in red on the screen grab on this page). The black and white point sliders are initially set to zero (black) and 255 (white) respectively, while the midtone slider indicates middle grey at the 1.00 mid-point.

Dragging any of these sliders will map the selected point to the equivalent position on the Output Levels scale below the histogram. Photoshop remaps the image’s tonal range according to this scale to keep all image tones within the limits of this scale. This adjusts the image tones to bring dark areas in the image closer to complete black and light areas to totally white, which usually increases image contrast.
While most images look best when they contain the full dark to light range of tones that can be displayed on screen or printed, there are some that require you to pay attention to the effects adjustments have on image tones. Photographs taken in soft lighting, such as fog or haze, seldom contain fully black or white regions so simply pulling in the black and white sliders will cause the lighting to appear harsher than it actually was.

These three pictures illustrate the effects the sliders can have on a high-key photograph taken in misty conditions. At the top is the original image with its histogram before Levels adjustments. Below it the image shows the effects of dragging the sliders in to the end points on the histogram. The bottom image shows a more conservative Levels adjustment that maintains the high key effect but increases contrast slightly to produce a more realistic result.
Whatever type of image you work with, care is required when moving the black and white point sliders to the end points of the histogram. It’s easy to clip the shadows and highlights, particularly when they are only one or two pixels deep.
Midtones can be tweaked with the midtone slider, which compresses or stretches the tones. Dragging it to the left stretches the histogram to the right and compresses it to the left and brightens the image. Dragging it to the right has the opposite effect, resulting in a darkening of the image. These adjustments require care because significant changes in tonal relationships can occur.

Opening up the midtones in an image in which the sky is correctly exposed but the foreground is too dark by moving the midtone slider (circled in red) to the left
Holding down the Alt key while dragging the black or white point slider shows regions in the image that are clipped. As you move the white point in, clipped areas will appear as bright points against a black background. Moving the black point in shows clipped areas as dark or coloured zones against a white background.
Colour Correction
Many photographers don’t realise the Levels adjustment can also be used to adjust the colour balance in images. Instead of simply using the RGB setting in the Channel drop-down menu, you can make separate adjustments to the Red, Green and Blue channels. This corrects both the tonal range and colour balance.
This time when you open the Levels dialog box, select the Red channel and hold down the Alt key on your computer’s keyboard. When you begin to move the white point slider inwards the image will change quickly to total black. As the slider is moved, red pixels will start to appear.

Holding down the Alt key and moving the white point slider inwards sets the limits for the highlight brightness.
At this point, stop moving the white point slider and change to the black point slider. Holding down the Alt key changes the image to red. As you slowly move the black point inwards, black pixels will start to appear, enabling you to set the maximum shadow density. Stop as soon as a small cluster of black points appear to prevent a loss of shadow details.

Use theblack point slider to setthe image’s shadow density.
The middle slider can be used to fine-tune the balance of the colour channel you are adjusting.
Repeat the process for each colour channel, taking note of the different shapes of the histogram for each channel. In each case, the image will turn green when the black point slider is selected in the green channel mode and blue in the blue channel mode.
You can return to the RGB channel and adjust the middle slider to correct the midtone brightness in the image globally, without altering the colour balance.
Excerpt from Photo Review Issue 65


