While tradition says you need a high-level camera with a high-quality wide-angle lens to take great landscape photos, many different types of cameras and lenses can produce impressive results.

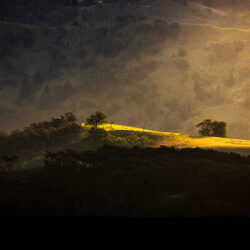
Modern equipment is versatile and capable of delivering eye-catching images like this shot by Christian Byrt of Bunbury Camera House, which was taken with a Sony ZV-E10. This compact ‘vlogging’ camera is light enough to take into out-of-the-way places and its 24.2-megapixel APS-C Exmor CMOS sensor and BIONZ X image processor deliver high-quality images and video clips. © Christian Byrt.
While advance planning and high-end equipment maximise your chances of obtaining good shots, there are times when you just happen to be in a beautiful and inspiring location with ideal lighting conditions and you don’t have your ‘best’ camera. In such situations, is it worth taking shots with whatever equipment you have at hand?
The answer, in most cases, is ‘yes’. Even the cameras in our phones should be capable of capturing snapshots – which is why we’ve devoted a large part of Chapter 3 to them. You can also ‘grab’ frames from video footage and use them as stills.

You can ‘grab’ frames from 4K video footage, including recordings from camcorders, and use them as 8.3-megapixel stills. (Source: Sony.)
Most cameras (including some smartphones) can record 4K video at 3840 x 2160 pixels, which can produce 8.3-megapixel images. In this chapter we look at the advantages and shortcomings of some of the cameras you could use.

Sony’s ZV-E10 ‘vlogging’ camera, now in its second generation, is an example of the type of camera that is becoming increasingly popular for its compact size, light weight, ease of use and versatility. (Source: Sony.)
Camera choices
Arguably, the best choice for landscape photography is an interchangeable-lens camera (ILC) with a large image sensor, a high megapixel count and raw file capture to record a wide range of tones without sacrificing highlights or shadows. However, cameras like that won’t suit everybody because they are large, heavy and expensive. They limit your chances of visiting places that can only be reached with long treks since carrying a lot of weight is very tiring. This raises the question: Can you make do with smaller and lighter equipment?

Micro Four Third (M4/3) system cameras – and their lenses –are generally smaller and lighter than their ‘full-frame’ equivalents, making them easier to take to out-of-the-way places. Many of these cameras are also highly weather-resistant and include powerful in-built stabilisation. (Source: OM Digital Solutions.)
For most people, the answer is ‘yes’ – provided you choose carefully, know how to use the camera and are prepared to spend time in post-capture production. As well as prioritising cameras capable of raw file capture, look for the following ‘essential’ features:
1. Weather resistance. Landscape photography is an outdoors activity and often reliant on weather conditions. Moisture and dust – which are often unavoidable – can damage a camera’s electronics so it’s worth using weather-sealed cameras. They are generally more robustly constructed and usually last longer than cheaper equipment.

Weather resistance in both camera body and lens are valuable features for landscape photographers. (Source: Sony.)
2. A viewfinder. Camera monitors can be difficult to use in bright outdoor lighting; an issue resolved with a viewfinder. Digital OLED screens show you the exact hues and tones the sensor records and provide a better ‘picture’ of the end result. You can also use them while recording video unlike optical ‘finders.
3. Portability. This is especially important for bushwalkers and anyone who wants to avoid the frequently-photographed places. Consider, instead, a compact camera with an integrated zoom lens.
4. Image stabilisation. In-built image stabilisation (IBIS) is well worth having in cameras because it works with all lenses. So is in-lens stabilisation – and when both types of stabilisation can work together (which normally happens when they come from the same manufacturer) you can get sharp handheld shots with up to eight stops slower shutter speeds than you could without stabilisation. Stabilised cameras and lenses also work well with a monopod.
5. Dynamic range extenders. Manufacturers have different names for this capability, which can range from Nikon’s D-lighting or Fujifilm’s D-range priority settings (to give just two examples) to special HDR (High Dynamic Range) modes. These settings maintain highlight and shadow detail in high-contrast scenes when you capture JPEG images. Some cameras also include tone curve adjustments for separate tweaking of highlights and/or shadows.
6. Grid lines. Grid lines overlaid in the viewfinder or on the LCD monitor screen help you keep horizons truly horizontal. They aren’t recorded on the image but can be useful aids for positioning elements in a scene when framing shots.

The grid lines have been used here to keep the horizon level and create a harmonious composition by framing the scene with the horizon one third of the way down from the top.
Why shoot raw files?
The main advantage of capturing raw files is they give you much more image data to work with, making it easier to produce the best possible image. JPEGs are the standard file format because they’re convenient to use, widely supported and much smaller in size.
But they’re smaller because they’ve been compressed – and that means a lot of the image data is discarded, permanently. In contrast, raw files contain all the information captured by your camera’s sensors – and if it’s compressed the process is ‘lossless’, which means no data is discarded.

This illustration shows the differences between a JPEG file (left) and a raw file (right) recorded simultaneously with a 20-megapixel, full-frame camera. Both images have been edited to bring out their best qualities but the difference between the 8-bit JPEG and 12-bit raw file is clear to see.
Raw files contain a wider dynamic range and colour spectrum than JPEGs recorded at the same time and give you complete control over all the image data captured. Data is discarded when JPEGs are compressed to 8-bit depth, which means 256 tonal levels for each of the three colour channels (red, green and blue).
Raw files have 12-bit, 14-bit or 16-bit colour depths. A 12-bit image contains 4096 tonal values for each colour channel (or the ability to reproduce 68,719,476,736 colours). A 14-bit image (16,384 tones per channel) can reproduce approximately 4 trillion tones, while a 16-bit image can manage more than 280 trillion tones.
More data gives you more leeway to adjust different image parameters without the image breaking up. If a raw image is under- or over-exposed, the additional data makes it easier to recover shadow and highlight details that are lost with JPEG compression.
The greater colour depth in raw files also gives you more leeway to adjust contrast and colour tone without causing posterisation or adding noise. New AI-based functions like image upscaling, canvas expansion and detail enhancement as well as all the useful things you can do with generative tools for filling-in and replacing parts of images work better when they have plenty of data to work with.
However, raw files are much larger than JPEGs and require more storage space so they’re harder to share online and must be converted into an editable format like TIFF or PSD before you can do anything with them. While you must learn how to use photo editing software, once mastered, working with raw files is more creatively satisfying than simply accepting the JPEG files your camera delivers.

The best compact cameras support raw file capture, giving them an advantage over many smartphone cameras. Models like the one shown here also have larger sensors but some, such as the one shown, lack the versatility of zoom lenses. (Source: Fujifilm.)
Lenses
By tradition, wide-angle lenses are normally recommended for landscape photography – although there’s no reason to use them exclusively. Standard and telephoto lenses may be preferable in some situations. Where possible you should match the lens you choose to the subject you’re photographing, based on the parameters in the table below.
| Lens type | Typical focal length in 35mm format | Best used when… |
| Ultra-wide angle | 12mm to 20mm | You want to encompass the greatest possible area in a single shot and can tolerate some rectilinear distortion. |
| Wide angle | 24mm to 40mm | You want wide-angle coverage without noticeable distortion. |
| Normal | 45mm to 60mm | You want to reproduce the same perspective as seen by the human eye. Good for shooting panoramas. |
| Medium telephoto | 70mm to 105mm | You want to photograph subjects that are further than you can reach by moving closer (e.g. subjects on the other side of a stream or road). |
| Long telephoto | 120mm to 300mm | You are photographing distant scenes or if you want to compress perspective in a scene or isolate a particular element. Watch out for reduced contrast due to haze. |
| Extreme telephoto | Over 300mm | You want more extreme perspective compression or if you want to include easily-spooked wildlife in shots. |
Most cameras automatically correct lens aberrations such as vignetting (corner darkening) and rectilinear distortion and many also correct chromatic aberration (which causes coloured fringing along high-contrast edges in photos). Lens flare is more difficult to correct but can often be avoided by fitting a lens hood and taking care when composing shots to keep the sun (and other bright light sources) well outside of the image frame.
Useful links
This article by Margaret Brown is an excerpt from Landscape Photography 2nd Edn.
Pocket guide Partners: Camera House and Sony.
![]()
![]()