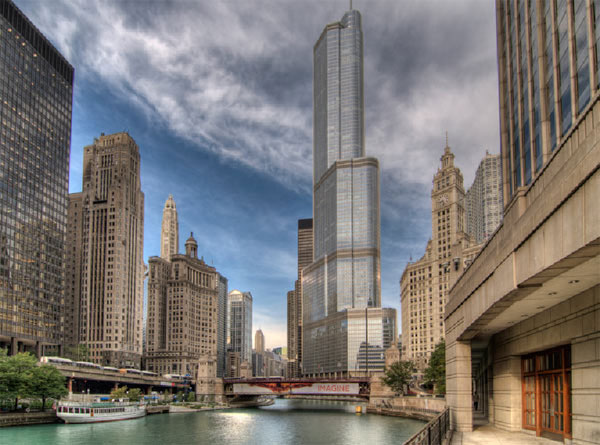
Gavin Phillips shows how to use HDR imaging to create superb images with fine detail, perfect lighting and accurate colours.
Inspiring ways to improve your photos
Inspiring ways to improve your photos
Gavin Phillips shows how to use HDR imaging to create superb images with fine detail, perfect lighting and accurate colours.

The last few versions of Adobe’s image editors, Photoshop and Photoshop Elements, have come with a powerful Raw file converter, Adobe Camera Raw. This application is being constantly updated to cover the latest digital cameras as they are released and, although some cameras take a while to be supported, having a capable Raw file converter built into your favourite image editor is an incentive to shoot Raw files whenever possible.

Some digital images lend themselves to artistic manipulation and it can be fun to experiment with the filter effects in your favourite software application to see what you end up with. In this tutorial we will edit an image to make it look like an oil painting. The process is very simple and straightfoward and can produce impressive results.
Selective Colour adjustment appears to be unique to Photoshop. You may be able to achieve similar effects with other image editing programs, but the Photoshop tool is very easy to locate and use – and produces excellent results. This tool is designed to let you vary the amount of process colours in the primary colours in a digital image – without affecting other colours in the picture.
For optimal results, when applying any form of sharpening to your digital images, follow these rules:
Although some countries require works to be ‘of artistic merit’, in Australia, copyright protection applies automatically to all photographs from the moment the camera’s shutter button is pressed. It doesn’t matter whether they are taken by a professional photographer or Aunty Jane and you don’t need to register or publish the photo or apply a copyright notice – the protection is free and automatic. In addition, most copyright protection applies worldwide.

All serious photographers shoot RAW files when taking pictures they plan to edit and print. The reason is simple: RAW files give you greater adjustment flexibility, thereby allowing you to recreate the shot you saw and gain the best quality from your digital camera. However, before you can edit RAW files from your camera they must be converted into standard TIFF or JPEG format.
Moving the slider to the right tilts the horizon on the right side upwards, while moving it to the left tilts the image in the opposite direction.
Changing the sizes of image files is one of the most common software-based tasks in digital photography. Regardless of the type of digital camera you own, there will be times when the files it produces have to be resized for either printing or emailing. The process is simple, and can be done with virtually any editing application. It allows you to match the image parameters to the way the image will be viewed, so you can share your photos more effectively. It can also save you both time and money when you want to have prints made at a lab.
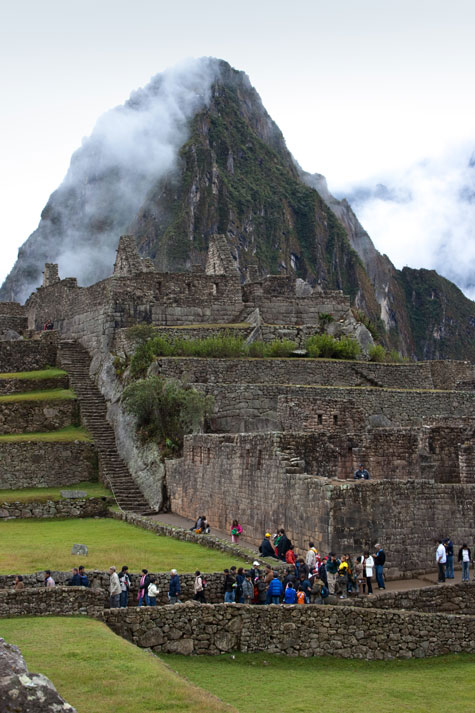
In the summer many photographers set off to visit iconic places. Often these are once-in-a-lifetime trips where you would like to take pictures without hordes of other tourists getting in the way.


How to capture high-quality, eye-catching action shots.
More info
Ads can be a pain, but they are our only way to maintain the server. Please deactive Ads blocker to read the content. Your co-operation is highly appreciated and we hope our service can be worth it.
