An outline of our review philosophy and test procedures to compare the performance of cameras and lenses.
Our underlying objective has been to set up a system that enables us to compare like with like, without reliance on subjective assessments, although subjective judgments inevitably come into play in some aspects of all testing.
Importantly, we invite ALL camera and lens manufacturers to submit their equipment for review. Our objective is to cover all the key products that enter the Australian market as quickly as possible after their release.
Photo Review is currently unique in being the only reviewer to convert the ‘type’ designation for sensor sizes into millimetres for all cameras reviewed. As well as giving readers some idea of actual image sensor sizes, this practice also allows camera buyers to calculate the actual size of photosites, which is the best indicator of potential picture quality.
What is Imatest?
All cameras and lenses tested by Photo Review are subjected to Imatest evaluation, which uses a test target/software evaluation system developed by Norman Koren in Boulder, Colorado (USA). The system provides objective measurements for:
– Image sharpness and the camera’s ability to record fine detail;
– Chromatic aberration;
– Colour recording quality, tonal response and colour noise;
– Camera tonal response and dynamic range.
See more information on the Imatest website.
To provide a uniform platform for comparison, we’ve been using the same version of Imatest for several years. Financial considerations were initially the main reason for this strategy (upgrades simply became too costly for us to afford on a regular basis). But we also became aware that with each upgrade to the software, certain testing parameters were being changed.
This would have compromised our ability to compare one camera in a manufacturer’s range with its predecessor and also cameras from different manufacturers that were tested at different times. The level playing field we sought to achieve would be eliminated.
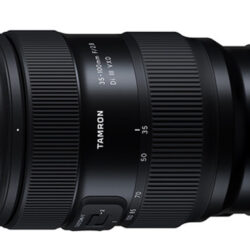
Another ‘level playing field’ strategy we employ is to base comparative lens tests on the highest-resolution JPEG images available in the camera used for the tests. Where the lens is supplied by a camera manufacturer, we test it on the supplied camera body. Lenses from independent manufacturers like Sigma and Tamron are tested on our Canon EOS 5D Mark II, which is used for lenses designed for all SLR bodies, or Canon EOS 7D, for ‘APS-C’ lenses. We’ve used these camera bodies since they were released, so they provide good continuity.
Basing our tests on JPEGs isn’t an ideal situation as JPEG files are inevitably influenced by in-camera processing. Each camera manufacturer’s processing algorithms are different and different adjustments are made to different image parameters. Processing algorithms also tend to be updated with new models, which is another reason to stick with two standard camera bodies wherever possible. However, by using the same camera bodies we can sidestep this problem most of the time ““ at least for Canon’s lenses and those from third-party manufacturers.
Using raw files could introduce even more processing anomalies because most raw file converters supplied with cameras automatically correct aberrations like distortion and chromatic aberration ““ at least to a degree. Similar corrections are also applied by many third-party raw file converters.
For our camera tests, we also report on the raw file performance of cameras that can capture raw files as well as JPEGs, and provide a set of graphs that allow readers to compare raw and JPEG performance across the key parameters of resolution, lateral chromatic aberration and colour accuracy. Where possible, the raw files are converted with Adobe Camera Raw in Photoshop, which once again provides continuity. Otherwise, we will use the software bundled with the camera or, if we can’t get it to work properly, an alternative file converter. No additional adjustments are made to raw files during the conversion process.
What to look for in Imatest graphs
Photo Review publishes five graphs showing the main results from our Imatest tests. These cover centre and edge resolution, lateral chromatic aberration and colour reproduction. Full technical details of how to interpret these graphs can be found at www.imatest.com/docs/sharpness.html#interpretation.
However, you can make a quick assessment of camera/lens performance from the two graphs showing centre and edge resolution. In each case, the target area measured is shown by a red mark on the thumbnail image of the test target in the top right corner of the graph. If the ‘ideal’ megapixels figure shown with the MTF50(corr) reading is better than half of the camera’s megapixel count (circled in red), it is capable of high resolution with this lens aperture and focal length setting.

Note: you can use the line widths per picture height (LW/PH) figure to calculate how large you can print images from this camera at this setting by dividing it by the proposed print height (narrowest side) in inches. For the camera represented in the graph above, the calculation for an A3+ print size (13 x 19 inches) is 2200 ø· 13 = 147.8 (which rates close to excellent).
The table below provides a guide to potential print quality, based on these calculations:
| MTF50 in LW/PH on the print |
Quality Level after processing, which may include additional sharpening |
| 1500 | Excellent: Extremely sharp at any viewing distance and about as sharp as most inkjet printers can print. |
| 1100 | Very Good: A3 and A3+ prints will look good at the correct viewing distance but not under a magnifier. Smaller prints look very good. |
| 800 | Good: Large prints look OK at the correct viewing distance but soft under close examination. Small prints may appear OK but definitely not ‘crisp’. |
Imatest assessments only measure lateral chromatic aberration (CA), which is often associated with coloured fringing in shots of contrasty subjects. Because this problem can’t be measured near the image centre, test results come only from edge measurements. In the graph shown, the severity of CA is indicated by the % of distance to corner figure (circled).

The table below provides a guide to the severity of CA based on these figures.
| CA in % of distance to corner | Severity of CA |
| 0 to 0.04 | Negligible |
| 0.04 to 0.08 | Low. Difficult to see unless you look for it. |
| 0.08 to 0.15 | Moderate. Somewhat visible at high magnifications. |
| Over 0.15 | Severe. Highly visible at high print magnifications. |
The Colour Error graph plots the values from the ColorChecker patch in the test target against a device-independent CIELAB colour space. The numbers indicate the respective ColorChecker patches. The background shows the expected colours (in monitor sRGB colour space), while the light grey curve shows the boundary of the sRGB colour space. The squares represent the ideal colour values, while the circles show where those colours are positioned with respect to the background by the camera.

Colour shifts can be clearly seen by comparing the position of the circles with respect to the squares. Circles located nearer to the edges of the graph indicate increased saturation, while those closer to the centre show reduced saturation. The ‘mean (average) camera saturation’ is shown as a percentage in the top right corner of the graph.
The colour analysis plot lets you compare ideal colour values with the ways in which colours are represented by the camera. The basis of the graph is the ColorChecker used in the test target. Each patch on the chart is divided into three squares. The outer square represents the patch as photographed. The central square is the ideal value for the square, corrected for the luminance of the photographed chart. The small rectangle to the right of the central square, is the ideal value of the patch, with no luminance correction.

Below the ColorChecker is a figure representing the exposure error in f-stops. This allows you to gauge how accurately the target has been exposed. Best results are obtained when this figure is less than 0.25 f-stops. We aim to keep that figure as close to zero as possible by taking great care with the original exposures.
Along the base of the graph are grayscale patches representing the Exaggerated White Balance Error. This shows any colour casts introduced by either the camera or the lighting. The illustration above shows the camera’s white balance is close to accurate. Small white balance errors may not show up in actual photos.
Subjective Assessments
Although we rate imaging performance on the basis of our Imatest results, other features can only be judged subjectively on the basis of our long-term knowledge of cameras and imaging technologies. One of the first factors we consider is build quality, where we examine the quality of the body construction and whether seams fit snugly, compartment doors close neatly and securely and the usability of the various dials and button controls.
We also report on ease of use, innovative features, menu design (shooting and playback) and the ability to shoot in low-light and backlit conditions. The effectiveness of stabilisation may also be reported on.
Camera Review Ratings
Ratings are based on how the camera performs in comparison to other cameras in the same category at the time the review was done. Readers should check the date of review and take that into consideration before making any purchase decision. The Overall rating also considers the camera’s price at the time of review.