Adobe’s Firefly-based generative AI tools provide easy-to-use editing capabilities that work seamlessly across all Creative Cloud apps and Mac, Windows, iOS or Android devices. [Article courtesy of Adobe]
Adobe’s Firefly is a set of creative generative AI tools in the Creative Cloud suite that have recently expanded to include image editing. More powerful and adjustable than many AI-powered image editors, Firefly-based image editing gives you much greater creative control of all adjustment parameters.

Firefly integrates seamlessly with all Creative Cloud apps, letting you generate content and instantly refine it in Photoshop, Lightroom, Premiere, Illustrator or InDesign without switching tools. It also works seamlessly across all your devices, whether you’re using Mac, Windows, iOS or Android.
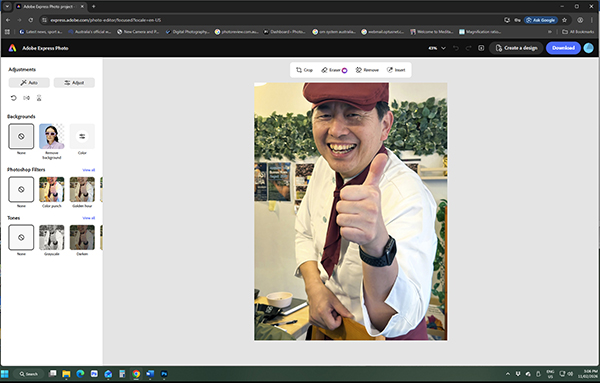
Choose from Adobe’ freeware app, which is ideal for occasional users, such as small businesses and social media posters. For serious users and professional users needing commercial-safe, fast content creation, the subscription model is more powerful and versatile. Both let you create personalised or branded visuals quickly and easily with simple AI edits and generative tools. A basic example that could work as a business promotion or a social media post is shown here.
Step 1: Remove background
Upload your photo to the Firefly web app and select Remove background from the left side panel.
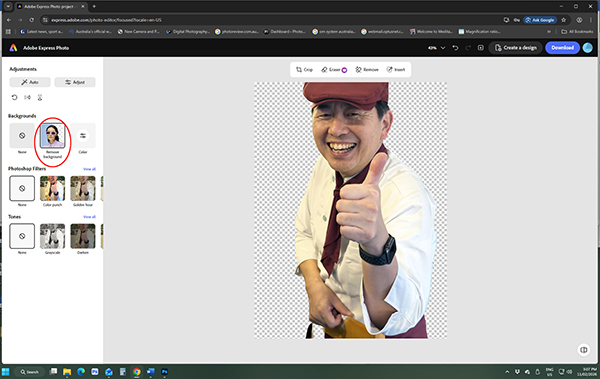
Firefly’s AI-based tools remove the background perfectly!
Step 2: Add new backgound
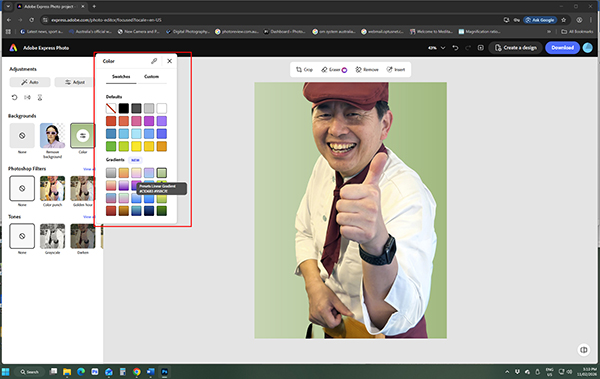
Next, fill-in the background with a solid or graduated colour chosen from the pop-up panel of swatches and gradients.
Step 3: Add text or graphics
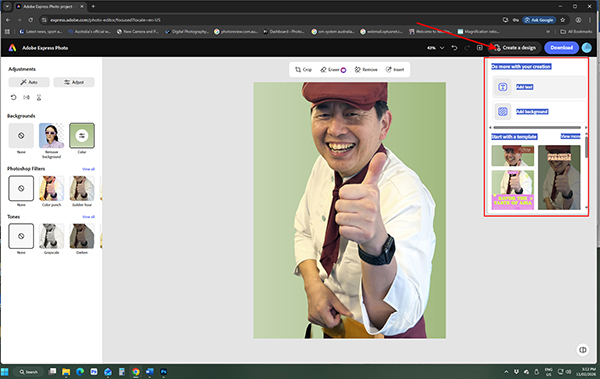
Click on the Create a design tab (shown with the red arrow) to add text, using a template from
the selections provided in the outlined box in this screen grab.

The right side panel provides text and graphics options, while the left side panel lets you select the font style, size and colour and apply different text layouts.
Prompt to Edit tools
The Prompt to Edit tools in the subscription software are more comprehensive and let you make more complex changes using prompts description what you want in everyday terms. You can tell Firefly to add or remove objects, swap backgrounds or refine details and specify where changes are to be made. The three screen grabs below show how easy it is to adjust a specific area in a scene using Prompt to Edit.
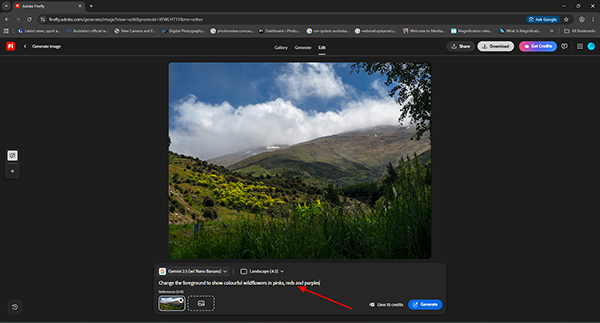
The prompt command is indicated by the red arrow in this screen grab. Your instructions should be reasonably specific.
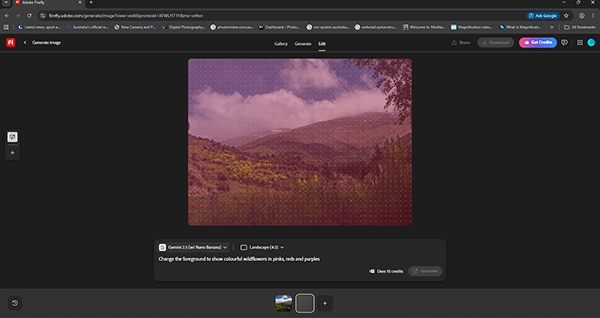
Firefly will take a minute or so to sample the image and apply the changes.
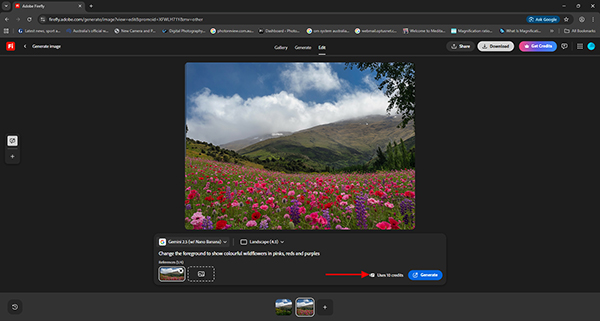
The end result. Note the expenditure of 10 credits to make this adjustment.
Firefly’s AI-powered processing is achieved through ‘generative credits’, which are added to your account monthly, and are governed by your plan. Freeware users get 25 credits per month, while Adobe Express Premium subscribers get 250, Creative cloud Single App subscribers get 500 and Creative Cloud Pro subscribers get 4000. (See credit allocations for different plans.) Unused credits do not carry over.
Suppose you’re not completely happy with the quick result you’ve obtained in an initial edit? The following screen grabs show how easy it is to move from Firefly to your preferred editing software when working on a more complex task.
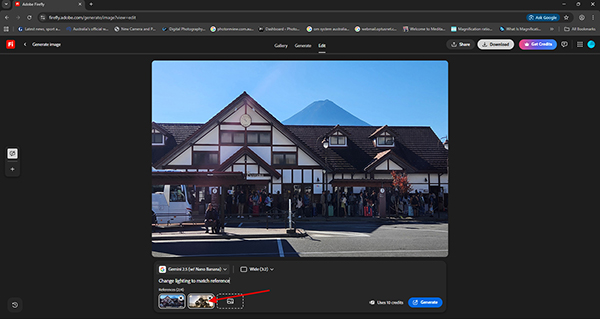
It’s easy to change the lighting in a scene with Generative Match by dropping a reference image showing the kind of lighting you want into the area indicated by the red arrow in this screen grab.
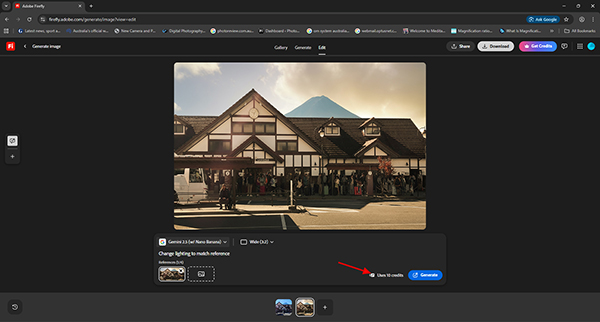
Firefly has done a good job initially – and it’s only cost you 10 credits. But the image would look better if its contrast and saturation were boosted a little.
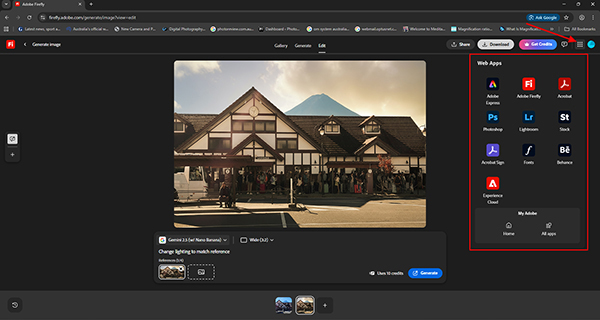
No problem! Simply click on the dotted square (indicated by the red arrow) to open the panel accessing Web apps or (by selecting the Home button in the My Adobe panel) on your computer.
This uploads your image to the selected application (in this case, Photoshop Online), where you have a useful range of adjustments and can make the required changes quickly.
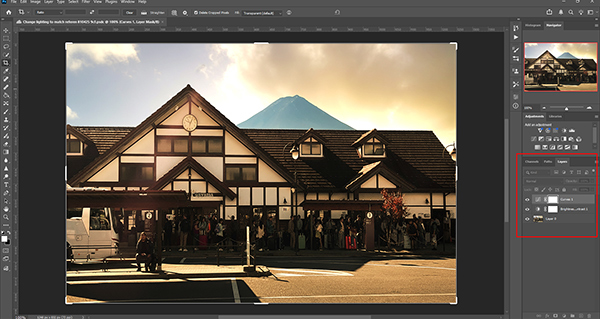
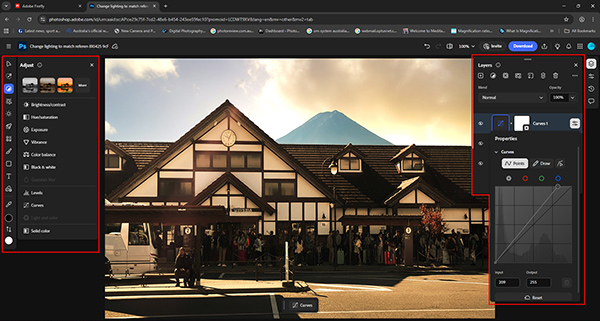
Each adjustment is applied as a separate layer, allowing further selective adjustments to be made. You’ll need to Flatten the image when your editing is completed to save the end result as a JPEG or other file format.
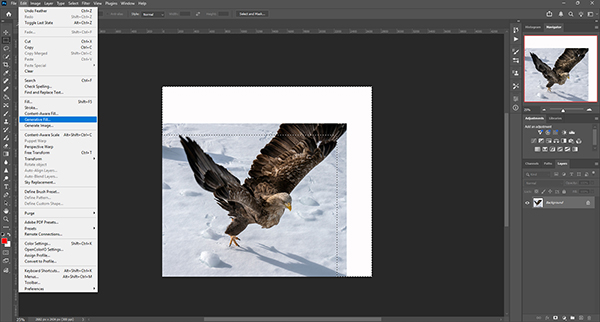
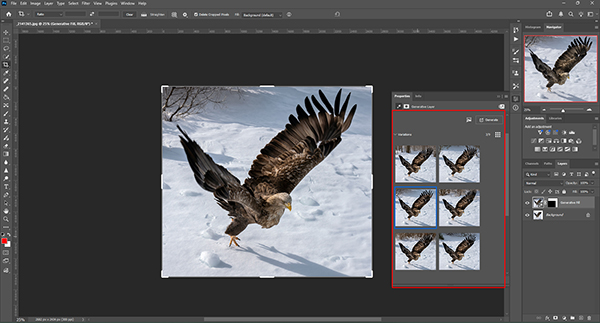
Regular users of Photoshop and Lightroom will be familiar with the Generative Fill and Generative Expand tools, which have been used here in Photoshop to expand the frame and take in the eagle’s full wing, which was cut off when the shot was taken. The two screen grabs below show these tools in use.
Adobe has now added two new adjustment layers to Photoshop – Clarity and Dehaze and Grain – to provide greater precision and control while masking and blending each adjustment seamlessly. These are shown in the screen grabs below, where Clarity adjustments have been applied to enhance the perceived ‘crispness’ of the eagle photo.

This screen grab shows the two new adjustment layers in Photoshop outlined in red.
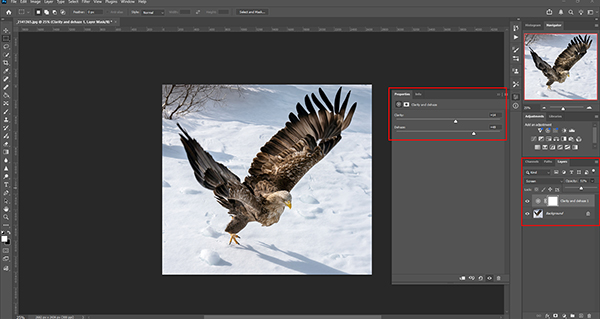
This screen grab shows the range of adjustments provided.
As an adjunct to the Clarity slider, the Dehaze tool lets you cut through atmospheric haze and balance lighting. The Grain adjustment provides an additional way to add depth and dimension to images.
Click here for more on Adobe Firefly and Creative Cloud